Carl Cervone
Here’s a Free, No-Code Way to Email POAP Links to a Big Group
April 20, 2022
POAPs are free, fun, digital memories.
POAPs are easy to create, but can be a little tedious to share with people unless you already have a list of wallet address / ENS names.
I created a simple no-code solution for emailing out POAP links to a group of people. It’s free and takes about 30 minutes to set-up, once you have your POAP art and mint links ready.
Create your POAP
You can create a POAP event here.
Remember to make something that looks cool and adhere to the image requirements (PNG format, measures 500x500px, round shape, size less than 200KB).
Also, remember this is a free, open-source service. Don’t spam the POAP team with lots of frivolous event requests. Don’t request 1000s of mint links (keep it to a minimum). Don’t set your expiry date more than a week or at most a month into the future.
Don’t poison the POAP well for the rest of us!
If you read the POAP discourse, you’ll see that POAP requests may be rejected because they lack a clear purpose, request too many mint links, etc. If you stick to the guidelines above, you should be fine!
Create you POAP and then wait up to 24 hours for your mint links to arrive in your inbox.
Now that you have your POAP claim links, you can proceed with automating the process of emailing them out to people.
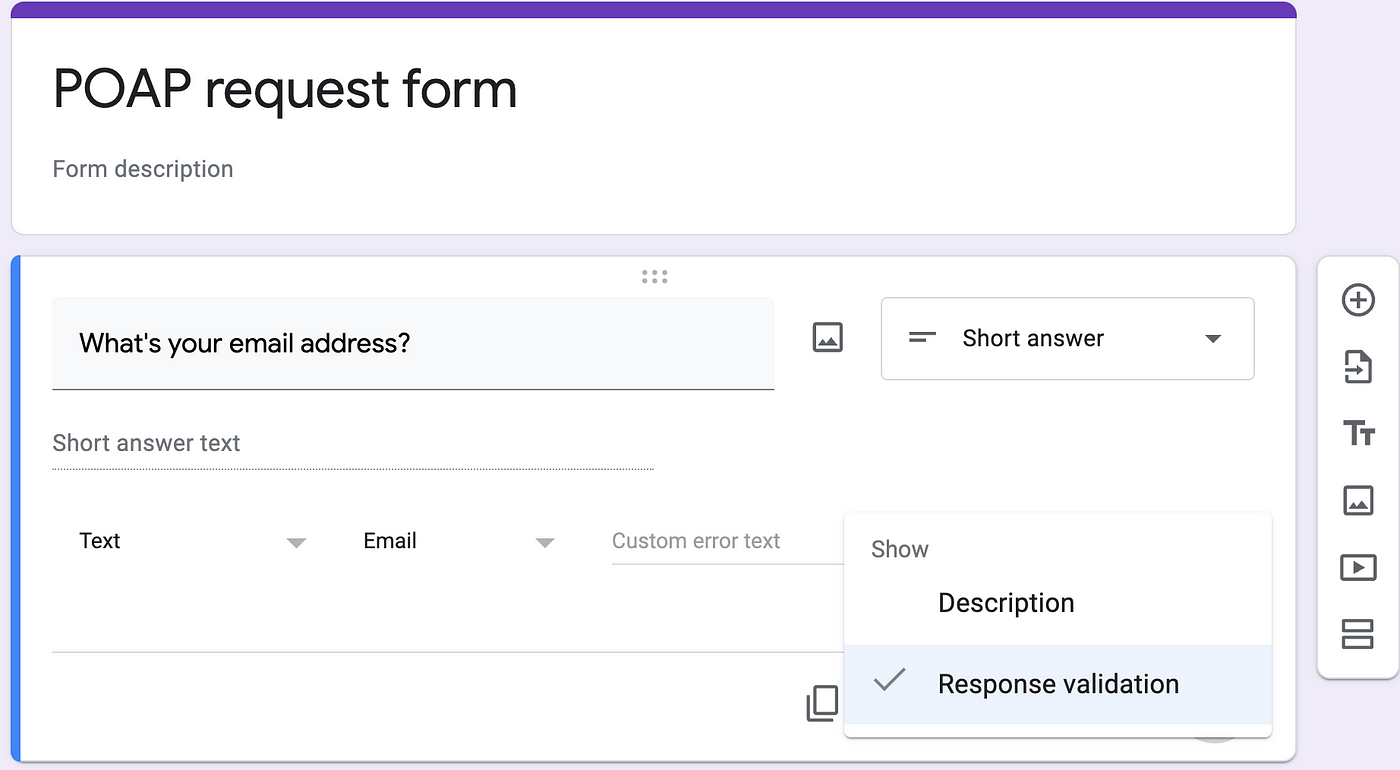
Set up a Google Form
Create a new Google Form. It only needs one question — what’s your email address — though of course you can ask for more information. I strongly recommend turning on response validation to check that you’re getting a valid email address from your respondents.
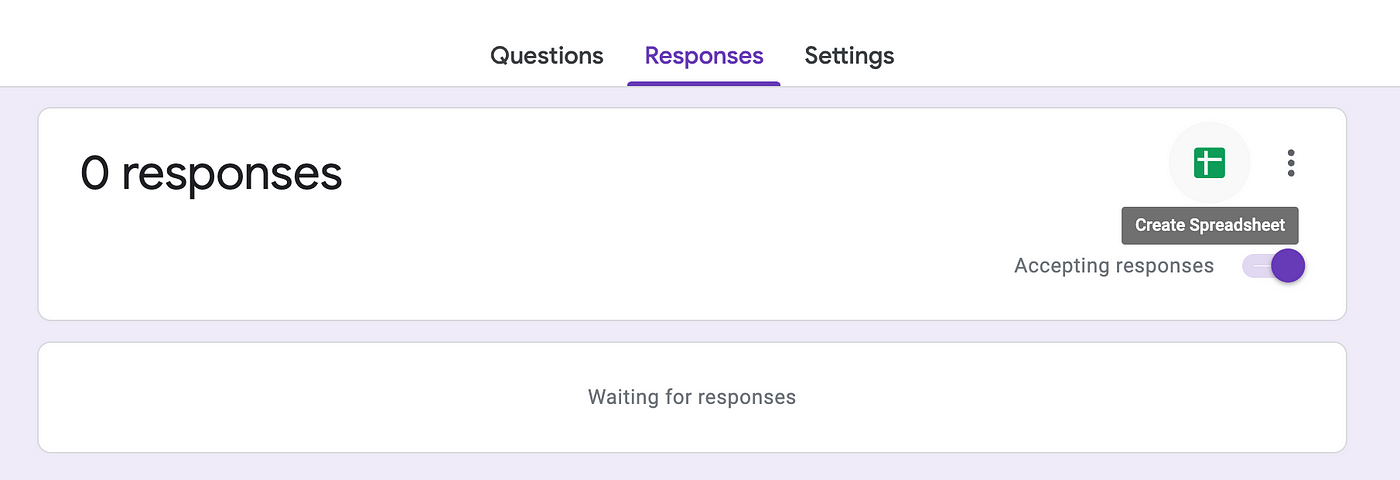
Once you’ve completed your form, toggle the Responses tab and click on the Create Spreadsheet button.
Customize your spreadsheet
After you’ve created a new spreadsheet, you should see an empty table (no entries) and a single worksheet tab called “Form Responses 1”.
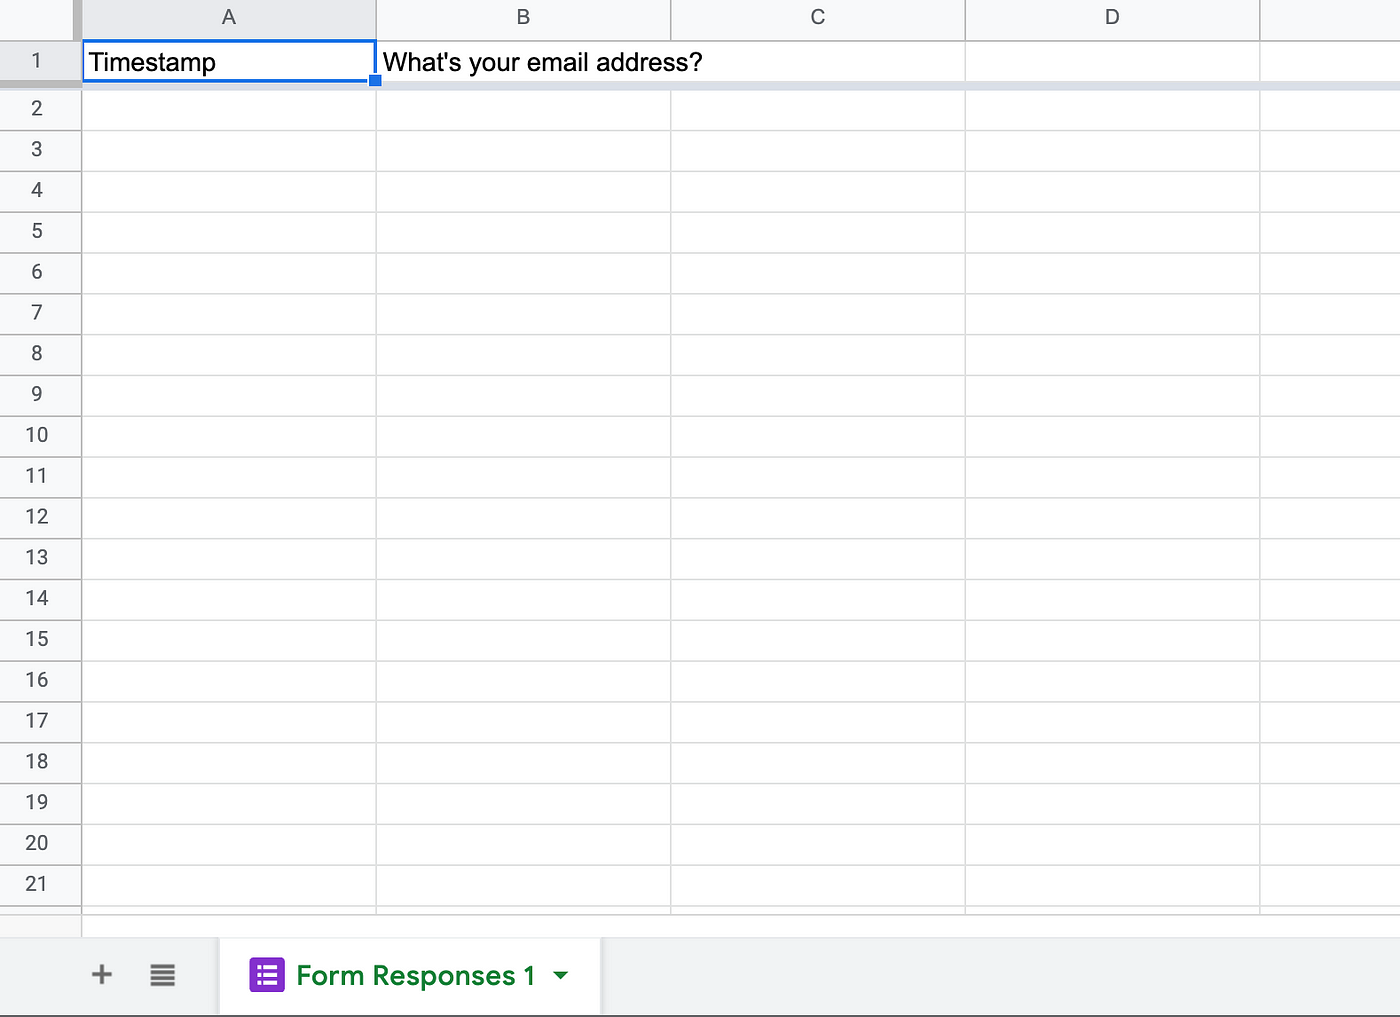
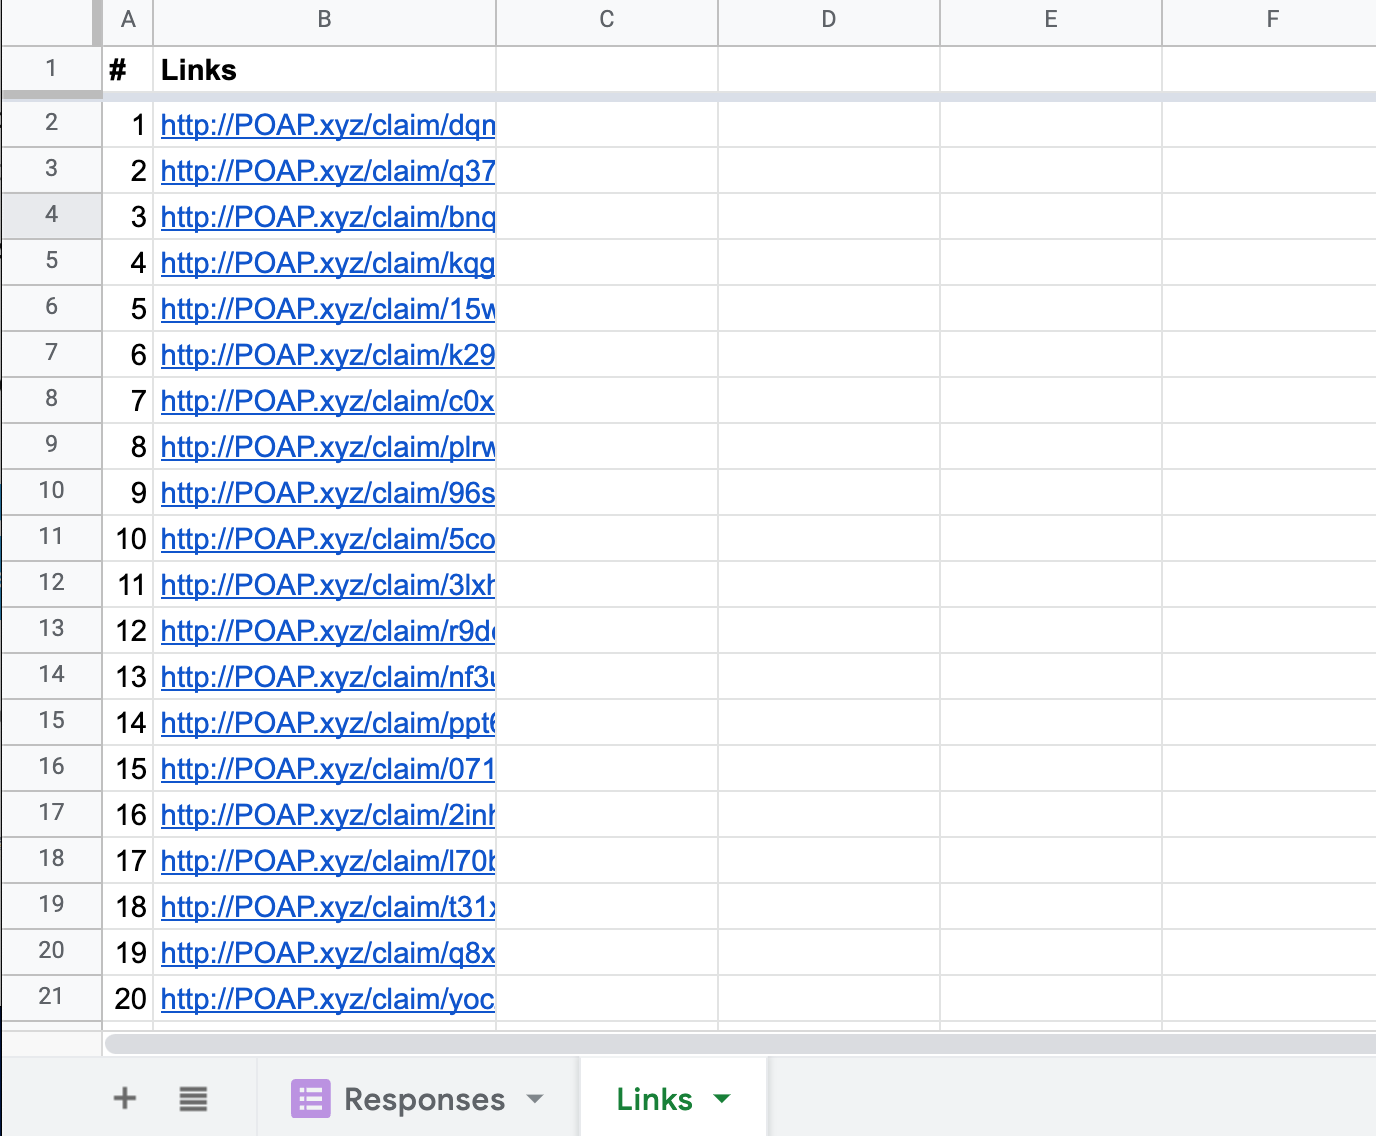
I recommend editing the tab name to “Responses”. Then create a new worksheet tab and name it “Links”. You can also name the header columns as I’ve done below.
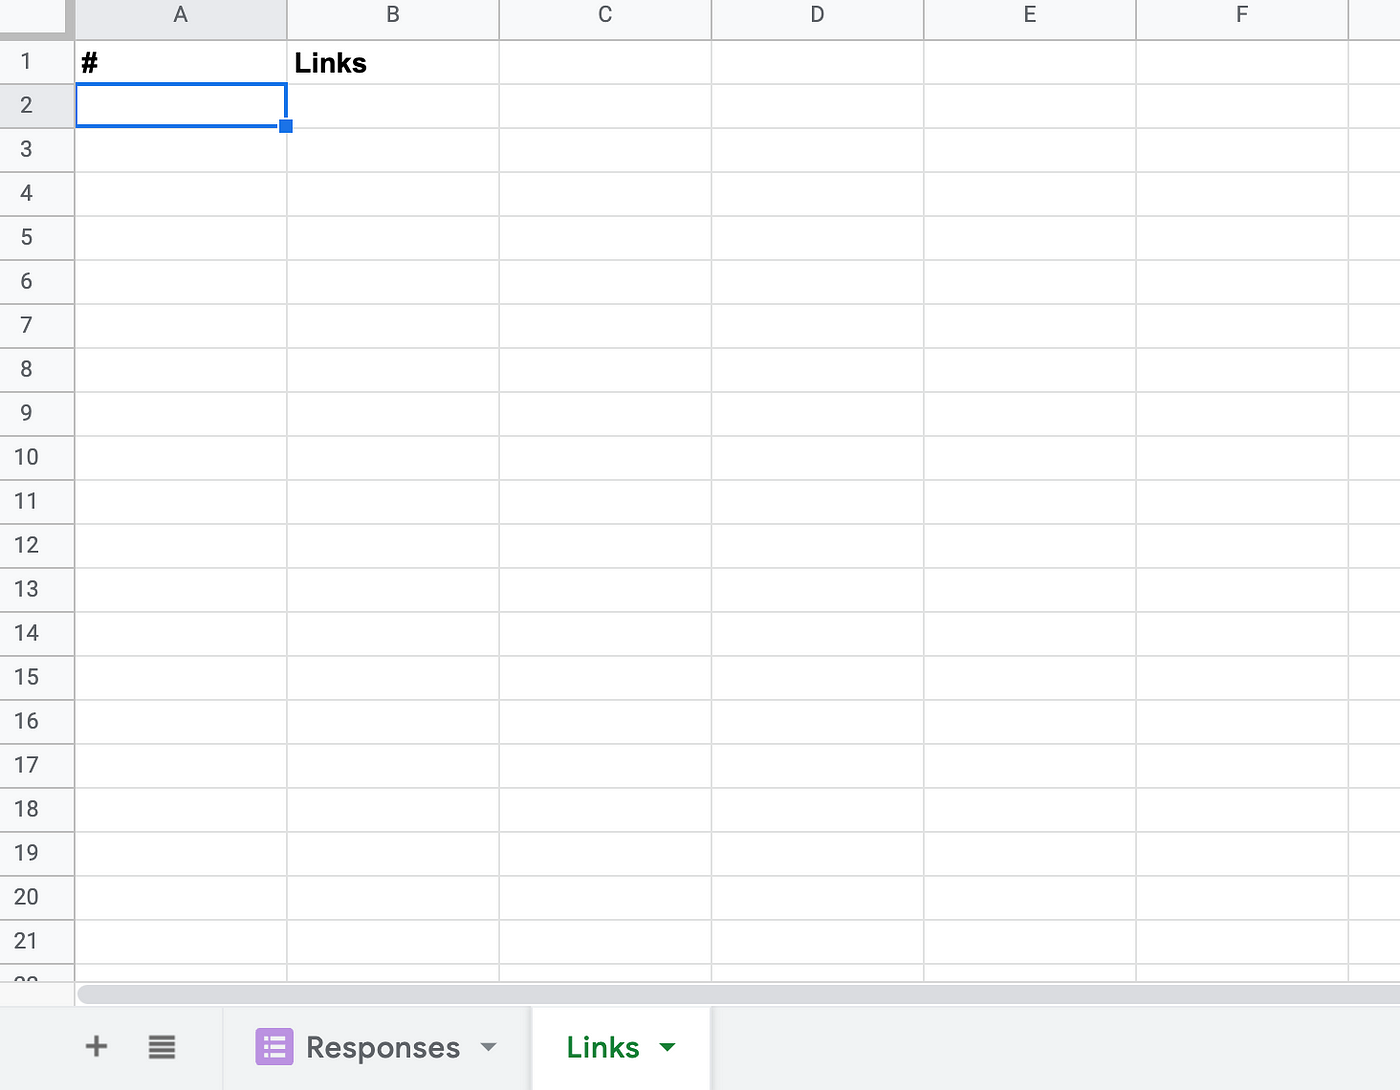
The next step is to copy-paste your POAP mint links into the second column. Once they’re in, assign a number to each row, from 1 to n (where n is the number of mint links you requested). Your “Links” sheet should look something like this now.
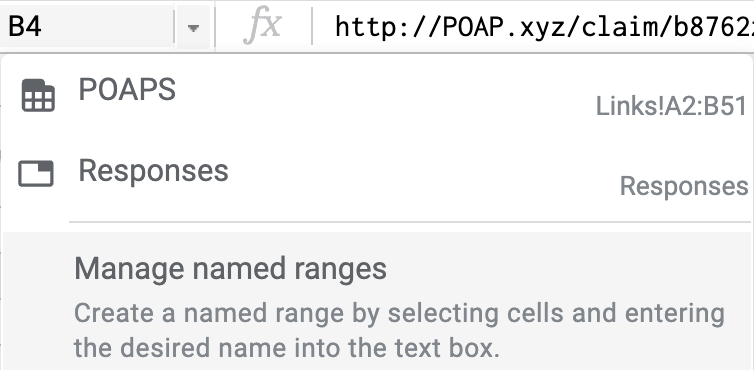
As good practice, I recommend selecting all relevant cells where you have numbers and mint links and naming the range with something like “POAPS”. Named ranges make your formulas easier to understand and audit.
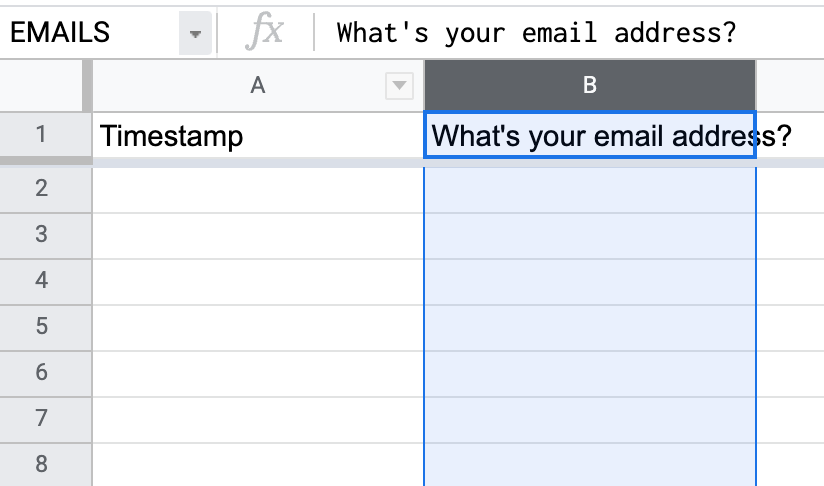
Now go back into the “Responses” sheet. Select Column B and name the range “EMAILS” to keep your formulas easy to read.
In Cell C1 (the header row), enter the following formula:
=arrayformula(
    if(row(EMAILS)=1,
       "Entry #",
       iferror(match(EMAILS,unique(EMAILS),0)-1)
     )
)
This formula is intended to handle duplicate entries (ie, if someone accidentally submits the Google Form twice). It also auto-labels the first row in the series as “Entry #”. You can test it out with some examples now.

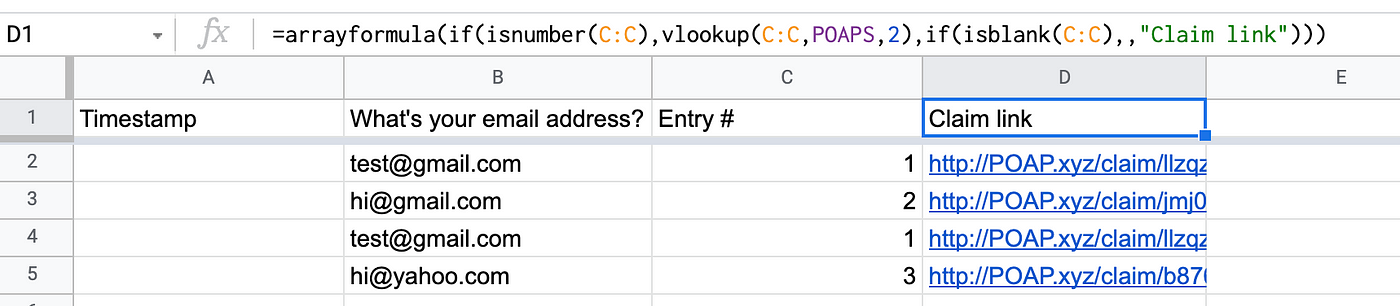
Next, we’ll add a formula to in Cell D1 to lookup the corresponding POAP claim link from our other sheet. We need to use a vlookup function because Google’s array formulas don’t play well with index and indirect statements.
=arrayformula(
    if(isnumber(C:C),
       vlookup(C:C,POAPS,2),
       if(isblank(C:C),,"Claim link")
    )
)
Like our other array formula, this one auto-labels the header row and has some error handling to deal with blank rows.
Once you’ve tested out your spreadsheet and confirmed it’s working correctly, we’re ready to move to the final step: automating the emails with Zapier.
Before going to Zapier, make sure you erase any dummy data from the spreadsheet (but don’t erase the content in Row 1). If you want, you can add a test email address, ie, your own email or a secondary email, to test that the system is working properly.
Automating emails with Zapier
If you haven’t used a no-code tool like Zapier before, this next step will make you smile!
Zapier is a paid service but simple “Zaps” are free. The pro version also gives you a 14-day free trial. You should be able to set-up this Zap with just a free account.
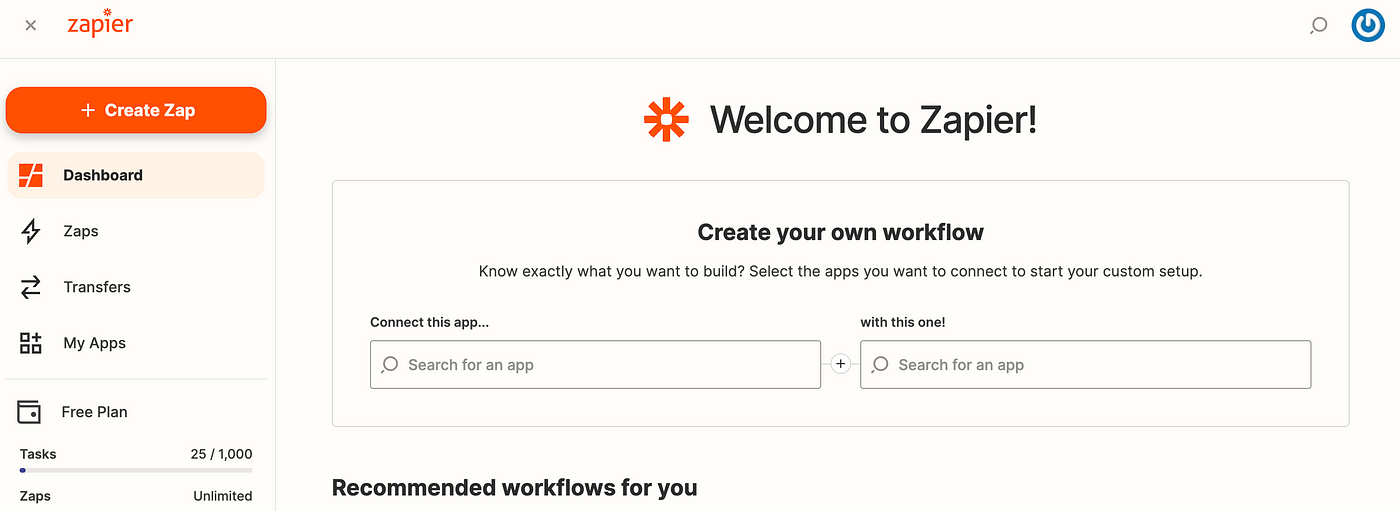
Set-up an account or log-in to your Zapier account. Once you’re ready to go, follow these steps.
Click the Create Zap button to start a new Zap.
Start your Zap with a Google Forms Trigger.
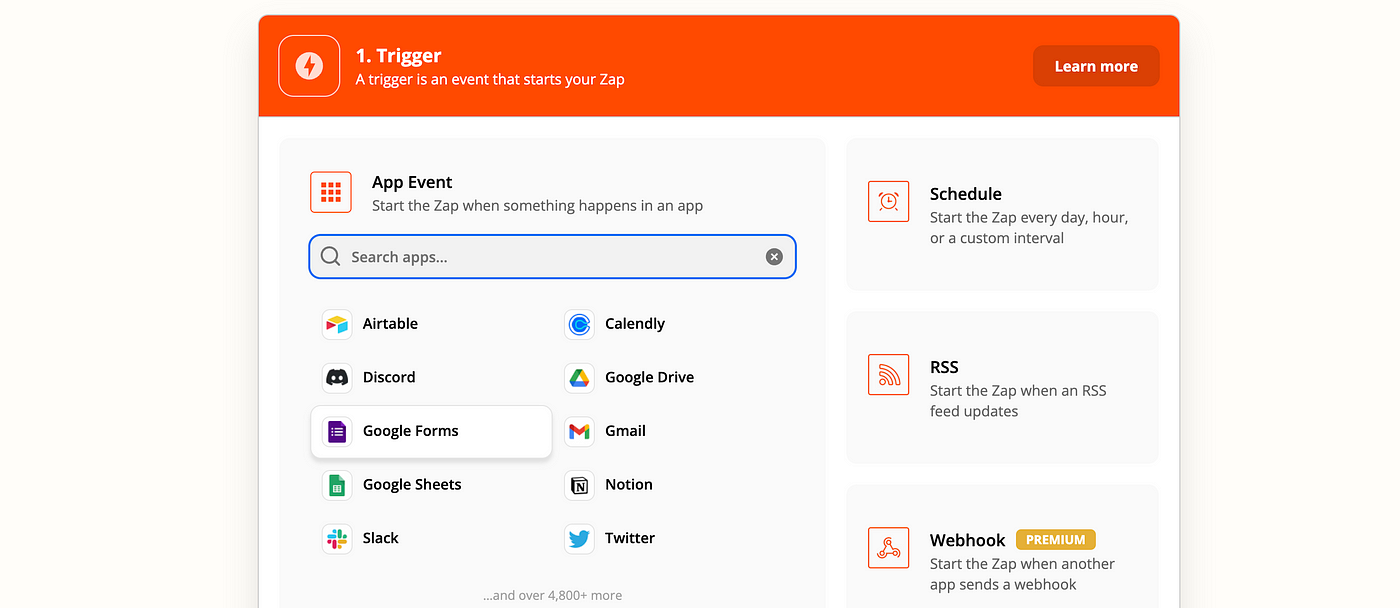
Set the Trigger to 1. New Response in Spreadsheet in Google Forms.
Next, choose the appropriate Google account and Spreadsheet from the list of options. (By default, your most newest spreadsheet will appear first.) Finally, select the “Responses” worksheet. Click Continue.
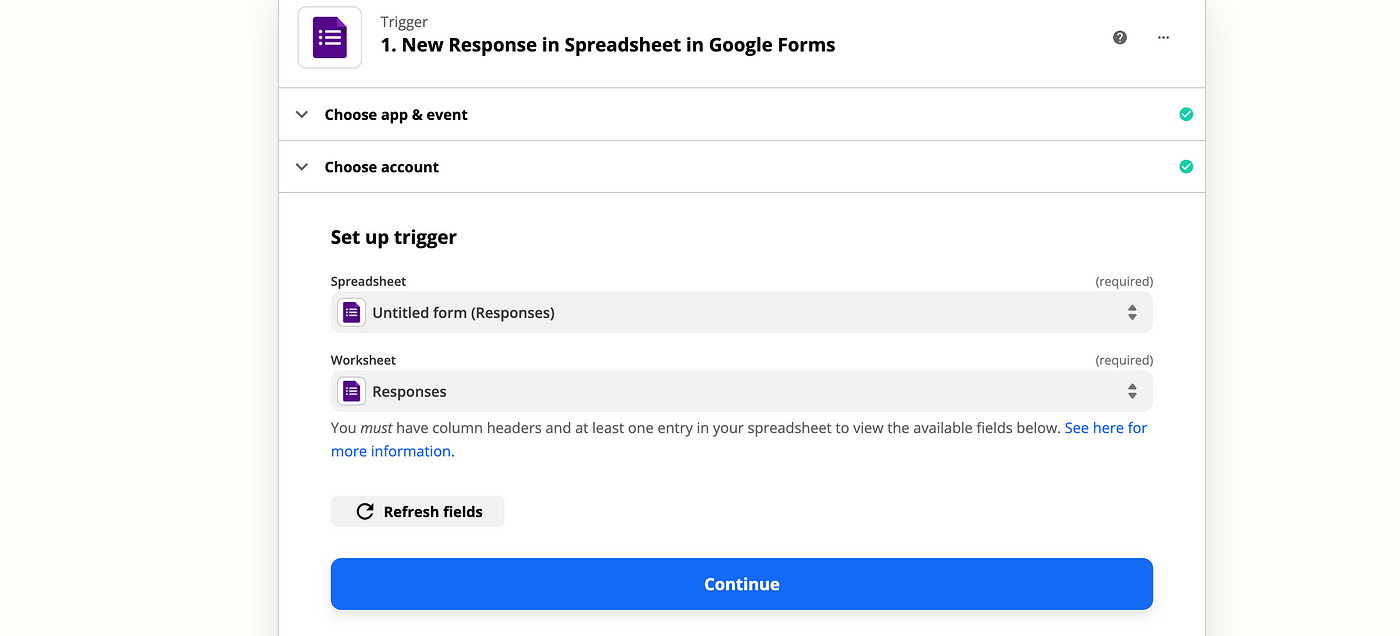
It will prompt you to Test the trigger. Run the test, confirm that it works, then press Continue.
Now you need to configure your Action in response to the trigger. Select the Gmail app.
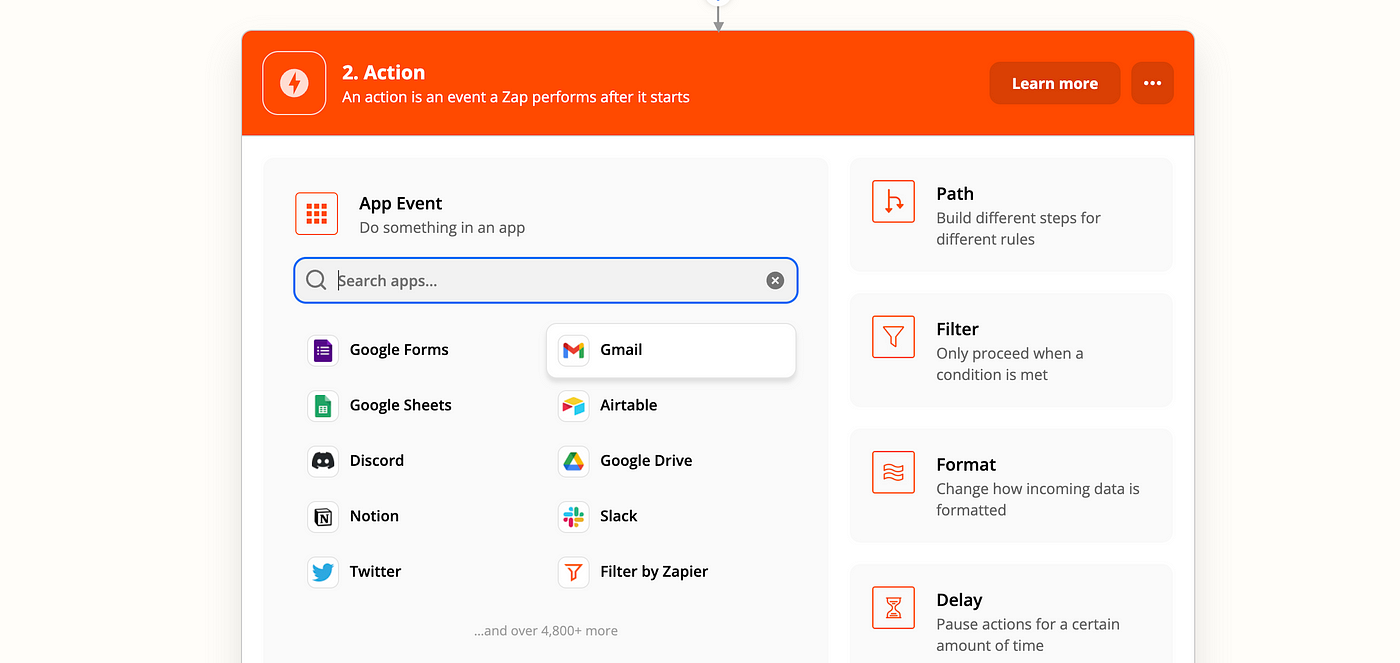
You’ll see a similar menu as the trigger menu. Set the Action to 2. Send Email in Gmail. Then choose your appropriate Gmail account.
Now you get to customize how you want the email to be composed.
In the To field, select the “What’s your email address?” column from your worksheet. Then select your own Gmail address for the From field. Add a Subject like “Claim your POAP”.
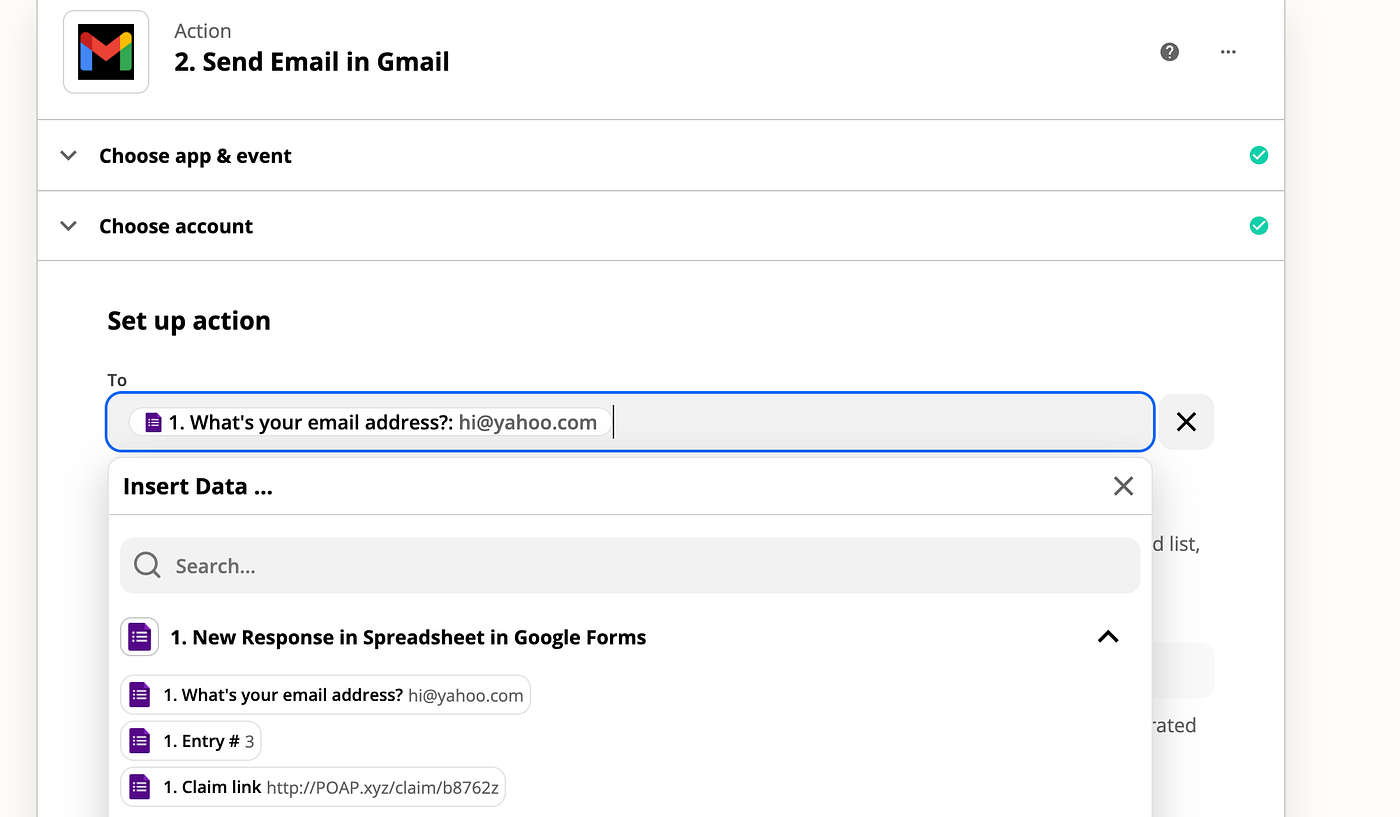
Once these fields are filled in, you need to add the Body of the email. You can do this with plain text or html formatting. For a simple email, I recommend keeping it as plain text. Type in the body text that you want and then use Insert Data to add a link to your “Claim Link”.

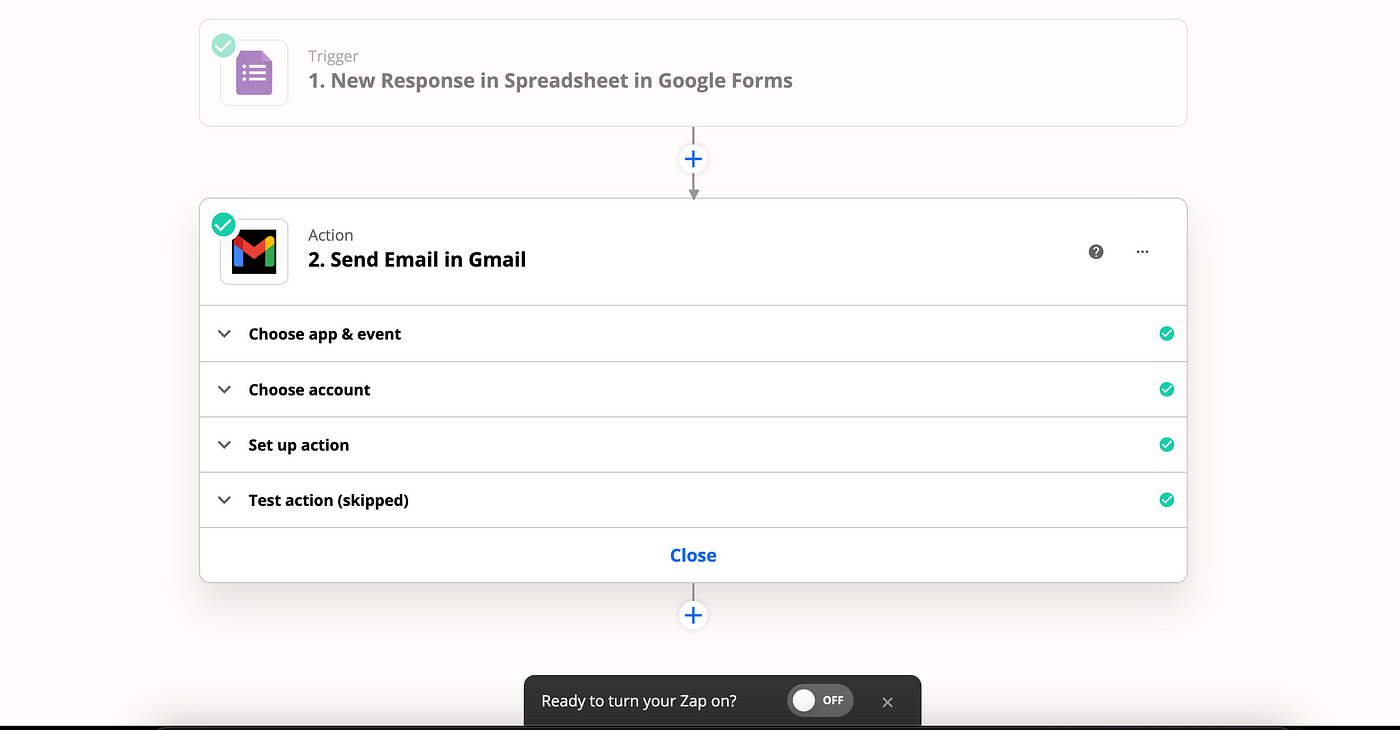
Now your Zap should be fully configured. You can do a Test Action (if you left a test email address in the spreadsheet) or you can skip the test. The final step is to turn your Zap on.
Finishing up
Once your Zap is turned on, you can manage it and make edits through your Zapier homepage. All that’s left is to share your Google Form link with your targeted audience and wait for the responses to roll in!
One word of caution: if you are posting your Google Form link to a public forum (eg, Twitter, a blog, etc), then you will likely get a lot of spam responses. You can handle this by creating a bit more friction on your Google Form or by adding a filter step to your Zapier workflow.
If you run into any issues, send me a message on Twitter!